Brows
Ombre Powder Brows on Dark Skin: Soft, Natural Look (2026)
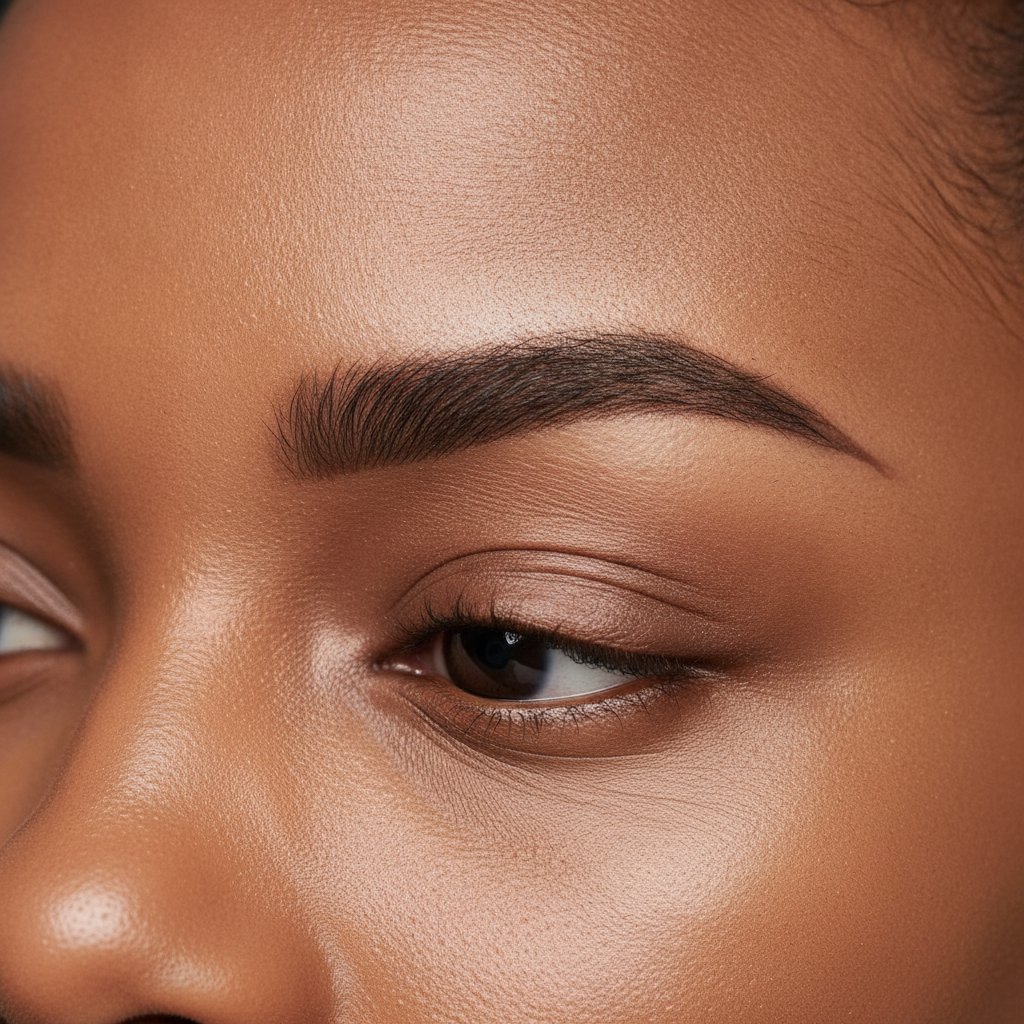
Ombre powder brows on dark skin are a semi-permanent shading technique that creates a soft gradient—lighter at the front, deeper at the tail—using pixelated dots. The result heals to a natural, makeup-like finish that complements melanin-rich complexions and reduces daily brow filling. It suits clients seeking long-lasting, low-maintenance definition.
By Honey Bloom Beauty • Last updated: 2026-06-28
Above-Fold Section: Hook + Table of Contents
This complete guide explains how ombre powder brows work on dark skin, which pigments flatter deeper tones, what healing looks like, and how to care for results. You’ll see real-world scenarios, step-by-step best practices, and a quick comparison to microblading to help you decide with confidence.
Here’s what you’ll learn at a glance.
- What ombre/powder brows are and why they suit deeper skin tones
- How the service works from consultation to touch-up (6–8 weeks)
- Shade selection for undertones (warm, neutral, cool modifiers)
- Aftercare timeline (days 1–10) and full stabilization (weeks 4–6)
- Microblading vs. powder brows for melanin-rich complexions
- Tools, hygiene, and safety fundamentals we follow in-studio
Overview
Ombre powder brows add a soft makeup effect using airy dots, not hair strokes. On dark skin, the gradient looks natural when pigments are warmed appropriately, healed over 4–6 weeks, and maintained with SPF. Expect a 2–3 hour appointment and a perfecting session at 6–8 weeks.
At Honey Bloom Beauty, our appointment-based studio prioritizes a calm environment and a personalized consultation before any procedure. We map to your face shape, evaluate your natural brow pattern, and discuss finish preferences so your results feel balanced and soft—never harsh.
What Is Ombre Powder Brows?
Ombre powder brows are a semi-permanent brow shading technique that places micro-dots of pigment in the upper dermis to mimic a soft powder makeup look. The gradient starts lighter at the head and builds to a deeper tail, creating polished yet natural definition for daily wear.
Unlike microblading, which creates individual strokes, powder/ombre brows use a stippling motion for a velvety finish. On deeper complexions (often Fitzpatrick IV–VI), this method avoids the risk of cool-toned strokes healing ashy. The soft gradient reads beautifully in photos and real life.
- Technique depth: Upper dermis placement with light, even passes to prioritize skin integrity.
- Session length: Commonly 2–3 hours including mapping, numbing, break checks, and aftercare review.
- Longevity range: Typically 1–3 years depending on skin type, sun exposure, and aftercare consistency.
- Perfecting session: Scheduled around 6–8 weeks to fine-tune density and symmetry after initial healing.
We begin every appointment with a tailored consultation to understand your goals. If you prefer “barely there” brows, we keep the front ultra-sheer and taper pigment density across the body for a whisper-soft fade.
Why It Matters for Dark Skin
For dark skin, ombre powder brows reduce the risk of ashy or gray healing by using warmer/neutral pigments and an airy gradient. The dot-based technique reads like makeup on deeper tones, offering low-maintenance fullness without harsh lines.
Darker skin can be more prone to post-inflammatory changes. A sheer-first approach with warmer modifiers helps prevent cool shifts as brows heal. Clients with melanin-rich complexions often want definition that still looks soft; powder shading delivers buildable density without blocky edges.
- Color theory in practice: Warm modifiers and carefully balanced tones help brows heal rich, not gray.
- Edge control: Feathered fronts and diffused borders preserve a skin-like transition in photos and in person.
- Skin response: Light passes with lower machine settings support even healing and minimize trauma.
- Finish goal: “Freshly tinted” or “softly penciled” rather than “solid tattoo.”
In our experience working with a wide range of undertones, a gradient that is about one step softer at the front than the tail creates the most natural read on deeper complexions over the full 4–6 week stabilization window.
How the Service Works (Step-by-Step)
The process includes consultation and mapping, topical numbing, pixel shading with a cosmetic device, and a 6–8 week perfecting session. Expect initial darkening for a few days, light flaking around days 4–7, and color softening by weeks 4–6.
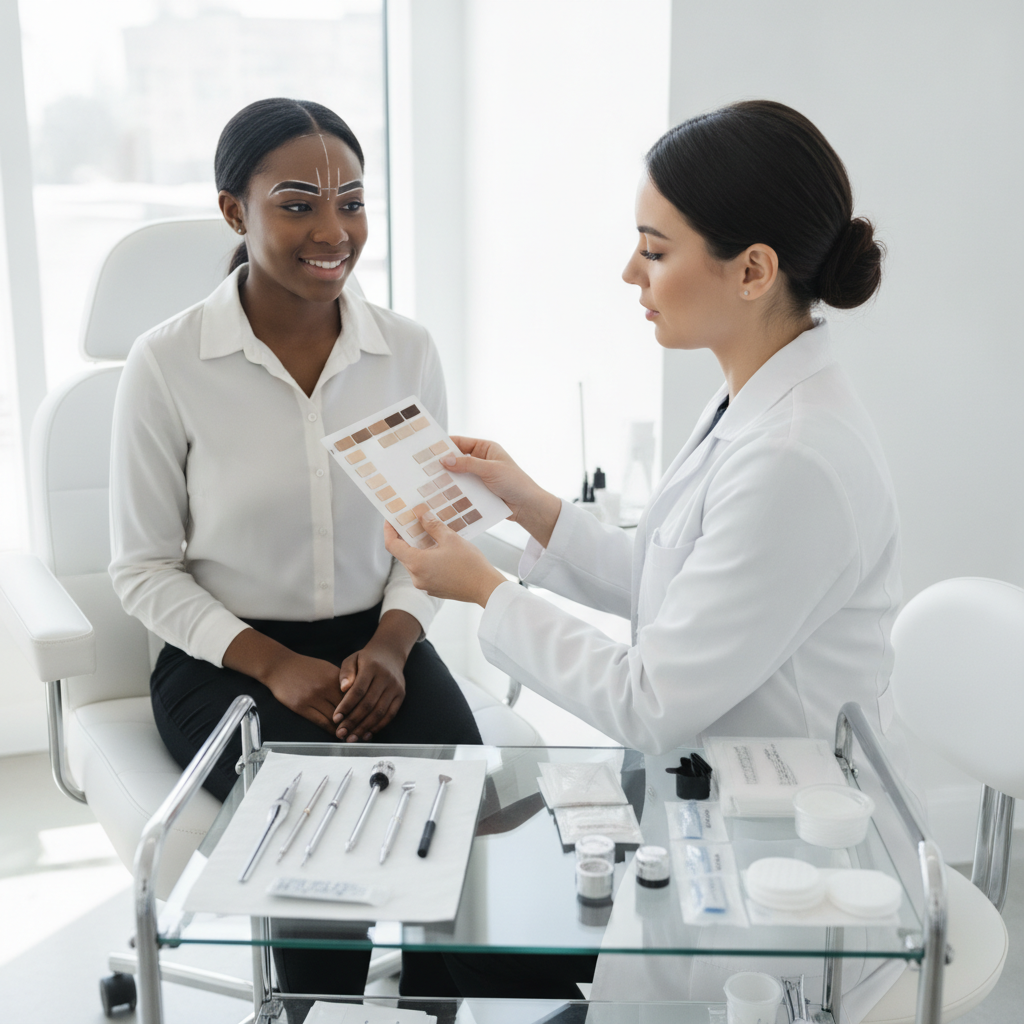
- Consultation (20–30 minutes): We assess face shape, brow symmetry, hair growth, and your finish preference (sheer, medium, or bold). We also review your skincare, sun habits, and any sensitivities.
- Mapping and preview (15–25 minutes): Balanced outlines are measured to frame your features. You approve the map before we start. Small adjustments now save time later.
- Topical numbing (10–15 minutes): A topical anesthetic is applied for comfort. Comfort checks continue throughout.
- Pixel shading (60–90 minutes): We build airy layers with light pressure, keeping fronts sheer and tails slightly fuller.
- Aftercare walk-through (10 minutes): You leave with clear, written instructions to protect the work during the first 7–10 days.
- Perfecting session (6–8 weeks): We refine color and density after the skin settles.
Most clients are surprised at how wearable the brows look even during healing. The key is resisting heavy moisture and sweat during days 1–7 so micro-crusting can form and release cleanly.
Shade Matching for Deeper Tones
Successful ombre powder brows on dark skin begin with undertone analysis. Warm or neutral-cool pigments balanced with warmth prevent gray shift. Aim one to two steps deeper than hair at the tail and one step softer at the front for a seamless gradient.
We evaluate natural brow hair, scalp hair, and overall undertone under neutral lighting. Then we choose pigment families with stable bases and, when needed, add warmth. A soft front keeps the look modern; a slightly deeper tail anchors the shape without appearing stamped.
- Undertone cues: Gold/olive suggests warm or neutral-warm; red/blue hints at neutralizing warmth.
- Front vs. tail: Keep the front 10–20% lighter in density; let the tail carry structure.
- Lifestyle lens: Frequent sun exposure can lighten brows faster; SPF 30+ after healing preserves tone.
- Longevity: On oilier skin, softer density resists blurring over 12–18 months.
During a consultation, we swatch on the forehead and jaw to confirm how pigments read against your skin and hair. Small differences in warmth can matter a lot once healed.
Types, Methods, and Approaches
Powder brows can be tailored from ultra-sheer to defined ombre. On dark skin, methods include airy pixelation, hybrid (light strokes plus shading), and structured ombre. We select technique and density based on skin type, hair presence, and your daily makeup style.
Common finish styles
- Ultra-sheer tint effect: Barely-there fronts, soft mid-body, and a subtle tail—ideal for minimal makeup routines.
- Classic ombre: Noticeable gradient with a softly tapered head and fuller tail for “tinted + pencil” effect.
- Hybrid brow: A few feather-light strokes where hair is sparse, then powder shading for body and tail.
Decision factors
- Skin behavior: Oilier skin prefers powder over strokes for cleaner healing and longevity.
- Hair density: More natural hair allows sheerer shading; sparse areas benefit from a bit more structure.
- Makeup habits: Daily full glam can carry a medium build; no-makeup looks shine with sheer tinting.
We map to your facial proportions, then adjust density within zones so the brow reads three-dimensional rather than flat. That nuance becomes even more important on deeper skin where contrast can escalate quickly.
Best Practices and Aftercare
Best results come from light-handed application, pigment warmth control, and strict aftercare. Keep brows dry for 24 hours, avoid heavy sweat and steam for 7–10 days, and apply a thin occlusive as directed. Expect full color stabilization by weeks 4–6.
Pre-appointment tips
- Pause retinoids/acids on the brow area for 5–7 days to reduce sensitivity.
- Avoid heavy caffeine the day of your service; it can increase minor pinpoint bleeding.
- Arrive with your everyday brow makeup. It’s a helpful reference for density and tone.
Aftercare musts (days 1–10)
- Keep brows dry for the first 24 hours; then cleanse gently with provided instructions.
- Apply a rice-grain amount of aftercare balm 1–2 times daily—no heavy layers.
- Avoid swimming, saunas, and intense workouts for about a week to protect micro-crusting.
- No picking or scratching. Flakes typically release between days 4–7.
Local considerations for ON
- Winter air in ON is dry; plan for slightly faster flaking around days 3–6 and use a humidifier at night.
- Summer humidity and outdoor activities increase sweat; book around major events and avoid pools for 7–10 days.
- Wedding season fills fast; reserve your perfecting session date (6–8 weeks after) when you book the initial appointment.
We provide written aftercare so you never have to guess. Small routine choices—like SPF 30+ daily once healed—extend richness over 12+ months.
Tools, Hygiene, and Safety
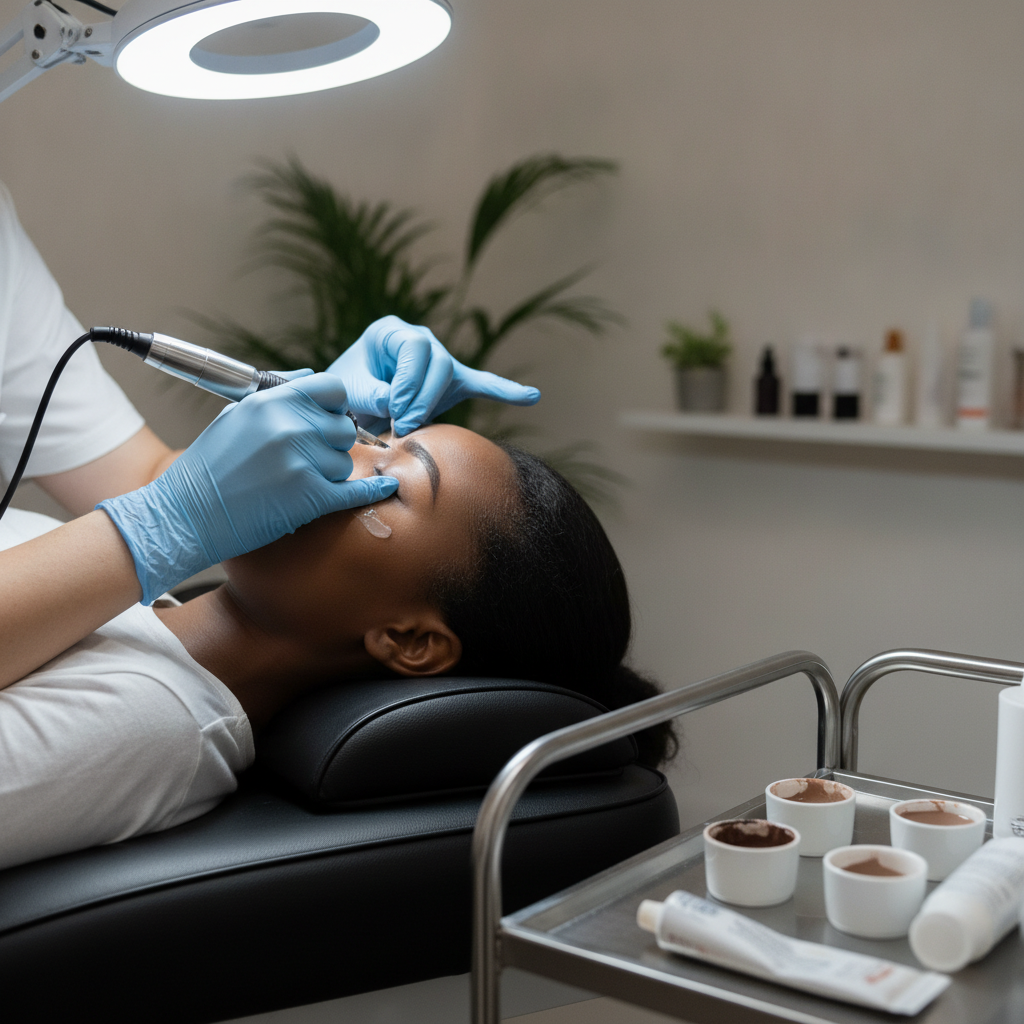
We use single-use cartridges, medical-grade hygiene protocols, and patch-test logic when needed. Topical anesthetics improve comfort, and controlled machine settings protect skin. Your comfort and safety guide every step—before, during, and after your appointment.
- Single-use setup: New needles and barrier film each appointment; instruments cleaned and disinfected between clients.
- Comfort protocols: Topical numbing is applied and checked throughout; sessions include breaks as needed.
- Skin-first settings: Lower voltage and light pressure encourage even, pixelated deposits and balanced healing.
- Allergy awareness: We review sensitivities and consider patch testing in select cases.
As a medical esthetician-led studio, our standards reflect both artistry and skin health. Your brows should look beautiful and your skin should feel cared for at every touchpoint.
Microblading vs. Ombre Powder on Dark Skin
On deeper complexions, powder shading often heals softer and more stable than microblading. Strokes can blur or cool over time on oilier, melanin-rich skin; powder’s gradient stays makeup-like, with lower trauma and flexible density options.
| Feature | Microblading | Ombre/Powder |
|---|---|---|
| Look on dark skin | Hair-like strokes; risk of cool shift | Soft, tinted gradient; warmth-adjusted |
| Best for skin type | Normal to dry | All types; especially combination/oily |
| Healing window | 4–6 weeks to stabilize | 4–6 weeks to stabilize |
| Maintenance | Touch-ups 12–24 months | Touch-ups 12–36 months |
| Front of brow | Visible strokes | Very sheer fade |
We do offer hybrid options when a few feathery strokes can add realism without compromising the soft powder finish you chose.
Healing Timeline and Expectations
Expect brows to look slightly darker for 2–3 days, then flake lightly days 4–7. Color appears softer by day 10 and settles fully by weeks 4–6. A perfecting session at 6–8 weeks refines shape and tone for long-term wear.
- Days 1–3: Brows appear bolder—this is temporary; avoid heavy moisture.
- Days 4–7: Light flaking; don’t pick. Keep aftercare balm thin and consistent.
- Days 8–14: Color looks lighter (“ghosting” phase); wait for color to bloom back.
- Weeks 4–6: Final tone and softness emerge; schedule your perfecting session if not already.
Longevity varies—sun, skincare actives, and natural oiliness all matter. Daily SPF after healing is one of the simplest ways to keep color true over 12–24 months.
Real Examples and Mini Case Insights
Our dark-skin clients most often pick sheer-to-medium ombre with warm-balanced pigments. Results look like a fresh tint on day 10, then soften by week 4. Touch-ups at 6–8 weeks address symmetry, warmth, and density preferences.
- Everyday natural: A client wanting “barely there” brows chose a warm-neutral medium brown. We kept the first 10% of the brow ultra-sheer. At week 6, we added a whisper more density to the tails only.
- Photo-forward finish: For a client who’s on camera often, we built a classic ombre—soft front, structured mid, defined tail—so the gradient reads in close-ups without looking stamped.
- Post-acne sensitive skin: With a skin-first approach and lighter machine settings, we created a soft tint effect. Healing was smooth with minimal flaking days 4–6.
Because we start with detailed mapping and a testable preview, you always have a say before shading begins. That collaboration is the quickest route to brows you’ll love at week 1 and year 1.
Tools and At-Home Resources
Support your results with simple tools: gentle cleanser, a thin occlusive, and SPF 30+ once healed. At home, avoid exfoliants on the brow zone and choose brow gels over tinting until 4–6 weeks post-service.
- Gentle, pH-balanced cleanser: Start 24 hours after your appointment as directed.
- Aftercare balm: Rice-grain amount 1–2 times daily; more isn’t better.
- SPF 30+ mineral sunscreen: Daily after healing to protect pigment stability.
- Brow gel only (first month): Skip chemical dyes and exfoliating acids on the area until stabilized.
Curious about shape language? Explore a general brow shape guide to better describe preferences during your consultation. It’s a helpful vocabulary exercise before we map.
Want expert eyes on your brows? Book a personalized consultation at Honey Bloom Beauty in ON. We’ll map, color-match, and design a finish that fits your routine. Reach us via our website, WhatsApp, phone, or email for scheduling.
Common Mistakes to Avoid
Avoid over-saturating the front, skipping warmth in pigments, and rushing aftercare. A sheer head, warmth-balanced tones, and 7–10 disciplined days of care prevent ashy healing and preserve a feathered gradient.
- Overbuilding day one: Heavier density can heal flat on oilier skin; build gradually over two sessions.
- Ignoring undertone: Dark skin benefits from warmth-balanced pigments to prevent cool shifts as brows settle.
- Aftercare shortcuts: Steam, sweat, and water exposure during days 1–7 disrupt clean healing.
- Harsh edges: Diffused borders look most natural, especially at the front 10–15% of the brow.
We prioritize restraint on day one so the healed result stays dimensional rather than stamped.
Frequently Asked Questions
Clients with dark skin get reliable, soft results with ombre powder brows when pigments are warmed, fronts are kept sheer, and aftercare is strict. Here are clear answers to the questions we hear most often in consultations.
Will ombre powder brows look natural on dark skin?
Yes. The technique uses tiny dots to mimic a soft tint. On deeper skin tones, a warmth-balanced pigment and a lighter front with a fuller tail prevent an ashy or stamped look once healed.
How long do results typically last?
Results commonly last 1–3 years. Sun exposure, skincare actives, and natural oiliness affect longevity. Most clients plan a perfecting session at 6–8 weeks and consider a color boost between 12–24 months.
What should I avoid during healing?
Keep the area dry for the first 24 hours, then cleanse gently. Avoid steam, saunas, pools, and intense workouts for 7–10 days. Don’t pick flakes. After healing, wear SPF 30+ daily to protect tone.
Is microblading or powder better for me?
For many with melanin-rich skin or oilier types, powder shading heals softer and more stable than strokes. If you like hair-like detail, a hybrid with very light strokes plus shading can balance realism and longevity.
Can I combine threading or tinting with powder brows?
Yes—just time it right. Threading is fine before mapping or after full healing (about 4–6 weeks). Hold off on chemical tints until brows stabilize, then keep products off the tattooed area.
Quick References and Style Examples
Use visual vocabulary when discussing your goals: soft fronts, diffused borders, and a tail that’s one step deeper. Reviewing style examples beforehand helps you communicate preferences clearly in your consultation.
To browse general style language, you might find these non-technical overviews useful: a simple natural brows overview, a bold brows overview, and a primer on threading basics. Bring screenshots you like—we’ll translate them into a mapped, face-fit design.
Conclusion and Next Steps
Ombre powder brows on dark skin deliver a soft, stable, makeup-like finish with low maintenance. With warmth-balanced pigments, careful mapping, and strict aftercare, results look natural from day 10 and refine at 6–8 weeks for long-term confidence.
- Schedule a consult to map and preview your design.
- Plan around your calendar for 7–10 low-activity healing days.
- Commit to SPF 30+ after healing to preserve tone.
Ready for brows that fit your routine? Book a tailored consultation at Honey Bloom Beauty in ON. We’ll match shade, shape, and density to your features and lifestyle.
Key Takeaways
Powder brows suit melanin-rich skin because pixel shading heals softly and stays stable. Keep the front sheer, select warmth-balanced pigments, and follow 7–10 days of aftercare. Expect full settling by weeks 4–6 and a perfecting session at 6–8 weeks.
- Dark skin benefits from warmth-balanced pigments to avoid cool shift.
- Healing: darker for 2–3 days, flaking days 4–7, bloom by day 10, settle weeks 4–6.
- Touch-up: plan at 6–8 weeks; consider a color boost at 12–24 months.